Stripe is an online payment service that has been integrated with Cirrus Shield CRM in order to manage invoice payments.
This guide includes all the essential steps needed to deploy invoice and to use Stripe.
Step 1 – Create the Invoice Object and add the following fields:
- Object Label = Invoice
- Object Name = Invoice (‘Object Name’ field should be set per instructed)
Note: * To use the online payment service, the ‘Name’ and the ‘Data Type’ should be set as instructed, otherwise the online payment won’t work.
1- Invoice Number
- Data Type = AutoNumber*
- Label = Invoice Number
- Name = Invoice_Number*
- Prefix = ‘Inv – ‘
- Format = 00000
- Starting Number = 1
2- Contact
- Data Type = Lookup Relationship*
- Label = Contact
- Name = Contact*
- Related To = Contact
- Relationship Name = Contact_Link
3- Amount
You have to create the “Invoice line” object before creating this field.
- Data Type = Roll-Up*
- Label = Amount
- Name = Amount*
- Summarized Object =Invoice Line Item
- Field to aggregate = Total Price
- Roll-up type = SUM
4- Payment Status
- Data Type = Picklist*
- Label = Payment Status
- Name = Payment_Status*
- Add the following to the list
- Unpaid*
- Paid*
- Tick the ‘Use first value as default value’ checkbox so that invoice is created unpaid by default. *
5- Payment Date
- Data Type = Date/Time*
- Label = Payment Date
- Name = Payment_Date*
6- Due Date
- Data Type = Date*
- Label = Due Date
- Name = Due_Date*
7- VAT
- Data Type = Number
- Label = VAT (%)
- Name = VAT*
- Length = 3
- Decimal Places= 2
8- Pay URL
- Data Type = Formula*
- Label = Pay URL
- Name = Pay_URL*
- Return Data Type = Text*
- Formula Field = HyperLink(“https://stripe.cirrus-shield.net/payment.php?i=”+ Id +
“&o=” + $Organization.Id , “Pay”)
Step 2 – Create the Invoice line item Object and add the following fields:
- Object Label = Invoice Line Item
- Object Name = Invoice_Line_Item (‘Object Name’ field should be set per instructed)
Note: * To use the online payment service, the ‘Name’ and the ‘Data Type’ should be set as instructed, otherwise the online payment won’t work.
1- Quantity
- Data Type = Number*
- Label = Quantity
- Name = Quantity*
2- Discount
- Data Type = Number*
- Label = Discount (%)
- Name = Discount*
- Length = 3
- Decimal Place = 2
3- Product
- Data Type = Lookup Relationship*
- Label = Product
- Name = Product*
- Related To =Product
- Relationship Name = Product_Link
4- Invoice
- Data Type = Lookup Relationship*
- Label = Invoice
- Name = Invoice*
- Related To =Invoice
- Relationship Name = Invoice_Link
5- Price
- Data Type = Formula*
- Label = Price
- Name = Price*
- Return Datatype = Currency
- Value = Product__ro.Default_Unit_Price * Quantity
6- Total Price
- Data Type = Formula*
- Label = Total Price
- Name = Total_Price*
- Return Datatype = Currency
- Value = Price – Price * Discount / 100
Step 3 – Create the Invoice tab :
- Create a new tab:
- Type = Object
- Label = Invoice
- Name = Invoice
- After that set Custom Object field to ‘Invoice’.
- Set up the profile who can use/view/modify this object:
- Enter the newly created tab’s details.
- Head to the ‘Profiles’ tab (found on the page’s header).
- Click on Edit profiles and add the users (in the organization) who can view Invoice.
- Go to the ‘Applications’ Tab (on the left side):
- Select the application that should enable Invoice (e.g CRM).
- Enter the selected application’s details and then head to the ‘Tabs’ tab (found on the page’s header).
- Edit the application’s tabs and then add Invoice object.
- Save everything and go to your application.
- You must see the Invoice Object added on the left pane, otherwise recheck the previous steps.
- After that, you need to add the Invoice Line Item to the Invoice via the page designer:
- Head to Page designer and create a new page designer for
- Invoice Line Items.
- Invoice
- After, a page has been created for Invoice Line Items, head to Invoice page designers and create a section for Invoice line Item.
- Put the “Invoice line item” related list in this section.
- Note that the section can be made as Tabs (by checking the Tabs checkbox).
- Head to Page designer and create a new page designer for
The configurations is now finished. To understand how to use the Stripe plugin, please go to :
Step 3 – Create the Invoice tab:
1- Create a new tab
- Type = Object
- Label = Invoice
- Name = Invoice
- After that set Custom Object field to ‘Invoice’.
2- Set up the profile who can use/view/modify this object
- Enter the newly created tab’s details.
- Head to the ‘Profiles’ tab (found on the page’s header).
- Click on Edit profiles and add the users (in the organization) who can view Invoice.
3- Go to the ‘Applications’ Tab (on the left side)
- Select the application that should enable Invoice (e.g CRM).
- Enter the selected application’s details and then head to the ‘Tabs’ tab (found on the page’s header).
- Edit the application’s tabs and then add Invoice object.
- Save everything and go to your application.
- You must see the Invoice Object added on the left pane, otherwise recheck the previous steps.
4- After that, you need to add the Invoice Line Item to the Invoice via the page designer
- Head to Page designer and create a new page designer for
- Invoice Line Items.
- Invoice
- After, a page has been created for Invoice Line Items, head to Invoice page designers and create a section for Invoice line Item.
- Put the “Invoice line item” related list in this section.
- Note that the section can be made as Tabs (by checking the Tabs checkbox).
Step 4 – Reconfiguration:
In case the user wanted to reconfigure the online payment service to change the stripe keys for example, then the below steps are to be followed:
1- Go to Setup menu and then create a new tab of type ‘web’.
2- The Label and name are up to the user to decide.
3- In the URL field paste the following: https://stripe.cirrus-shield.net/InvoiceUsers_Management.php
4- After that, set the profiles who are allowed to view the tab and then add the tab to the desired application.
5- Consequently, a tab in the application is added. Hence, if you visit this tab, the same configuration process is done.
The configurations is now finished. To understand how to use the Stripe plugin, please go to : User Guide – Stripe Integration.
Step 4 – Create a Stripe account
- To activate online payment, first of all, a Stripe account should be made on https://stripe.com/.
- This account is required to receive money transfer from paid invoice.
- After setting the account and logging in, enter the ‘API’ tab found on the left pane of the page. Two keys should appear:

- Make sure that these keys are not for testing (under testing tab).
- These keys will be used in the Invoice configuration, which is explained next.
Step 5 – Configure the online payment service in Cirrus Shield CRM:
- Once a new invoice is created, an automatic URL will appear (when viewing the invoice). Check the below figure:
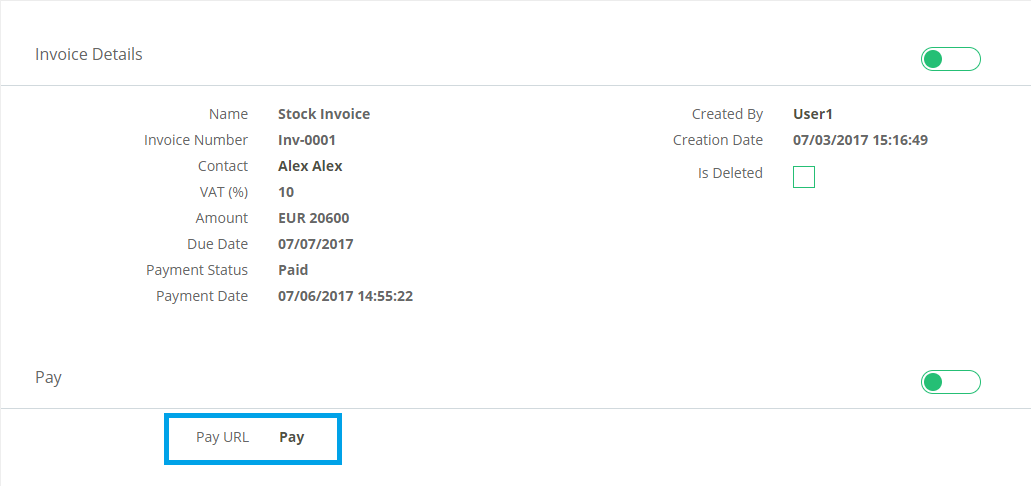
- To configure the online payment service, click the Pay link.
- A page will appear asking for credentials and keys:
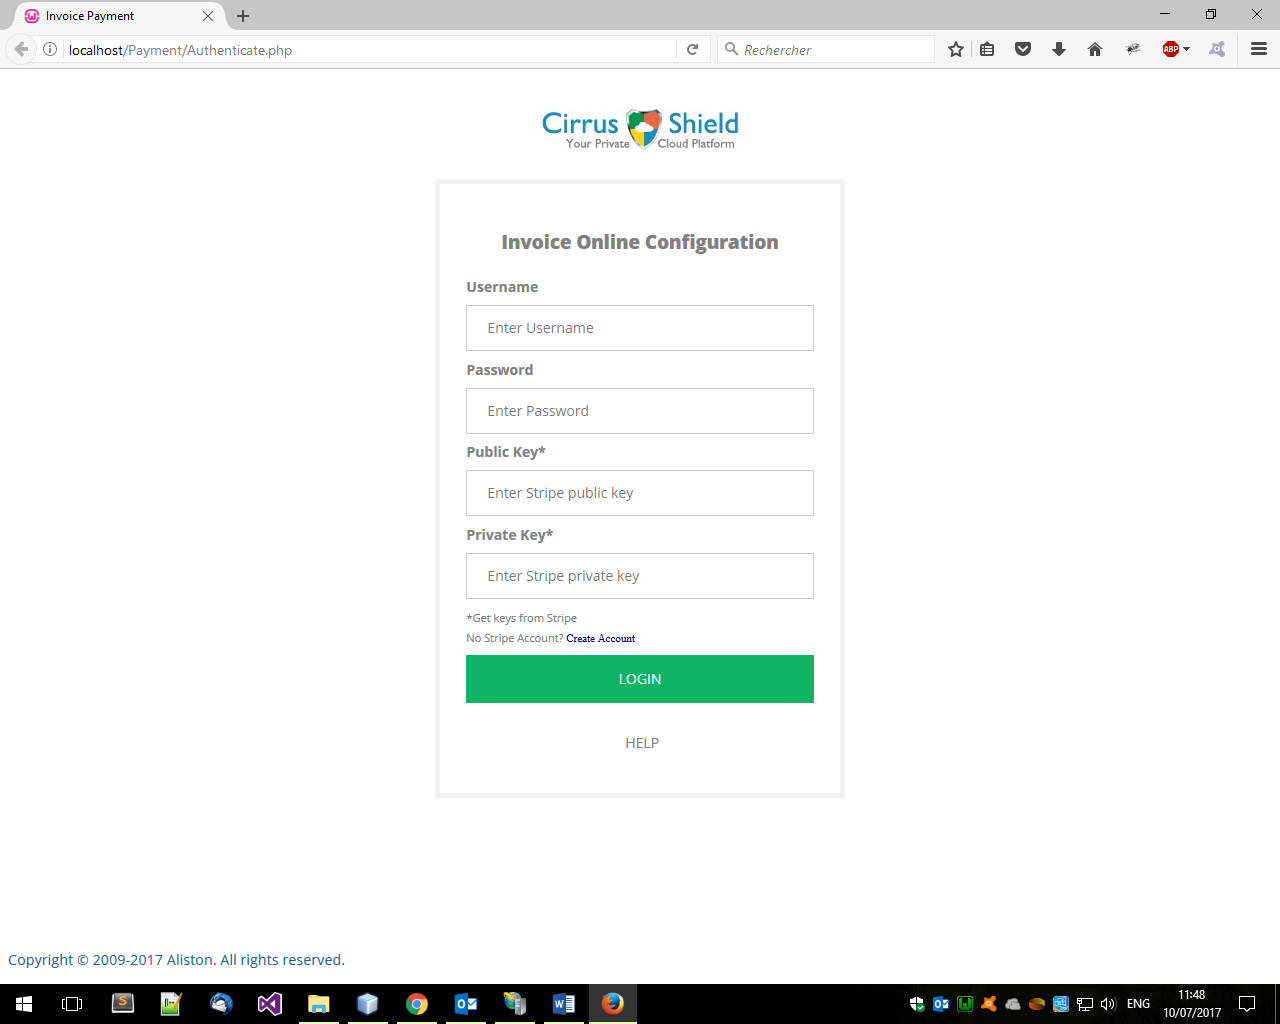
- The username and password are those of Cirrus-Shield.
- The keys are those in the Stripe account.
- Paste the publishable key (eg. pk_test_grMBRVsjMzpSGpPkrUwgsRpz) into the public key text box and then paste secret key into the private key text box. Hit login, and the configuration is complete.
Note that the configuration process is required once.