Introduction
This guide aims to walk you through the process of effectively integrate DocuSign with Cirrus Shield.
Prerequisites
Before you can start using the service, you will need to do the following steps:
IN DOCUSIGN :
- Create a DocuSign account :
You must create a DocuSign developer account and a production account.
- Developer Account: Begin by creating a DocuSign developer account, which is essential for the creation of a DocuSign Application. Here is the link to create a DocuSign Developer account: https://developers.docusign.com/
- Production Account: To deploy your DocuSign application for actual use, beyond the testing phase, you will need a production account.
- Authorize a DocuSign Administrator: It is crucial to appoint a DocuSign Administrator within your account, be it a developer or production account. This individual will serve as the representative for the account and grant consent for envelopes sent for signature under their authority. This consent mechanism helps ensure that documents are legally binding when signed through DocuSign.
2. Create DocuSign Application :
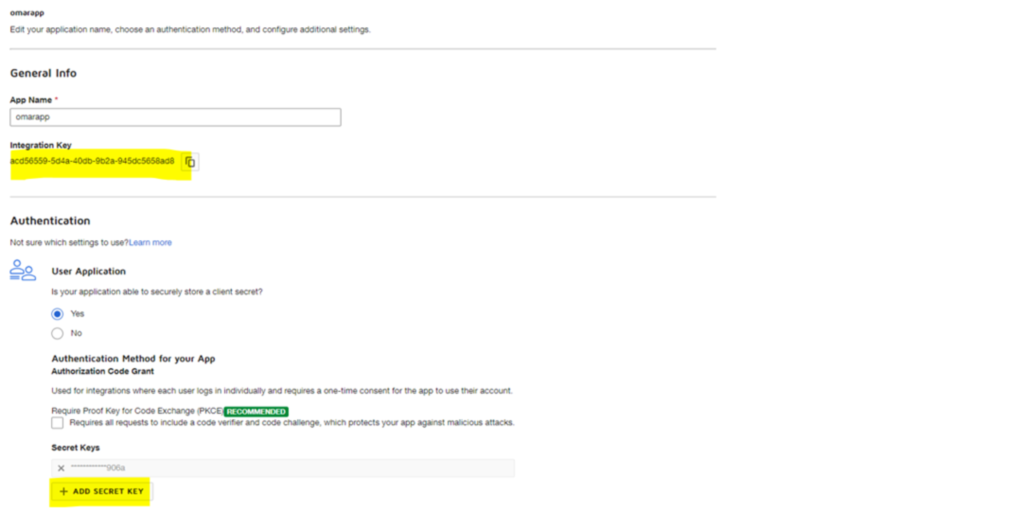
You must create a DocuSign Application so it can be linked to cirrus shield, and the linking will happen with the obtaining of the application credentials (Integration Key & Secret Key).
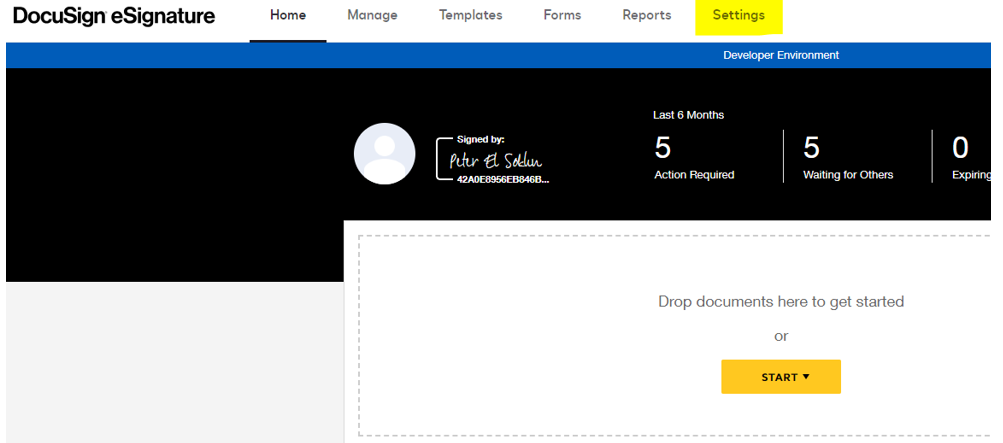
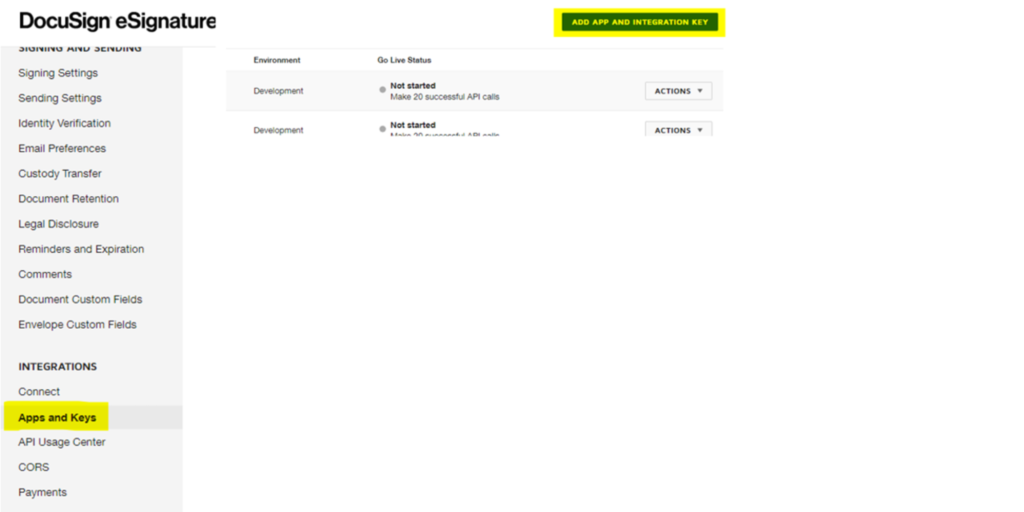
To do so, you must go to the Settings tab -> Apps & Keys and then click on “Add App and Integration Key”
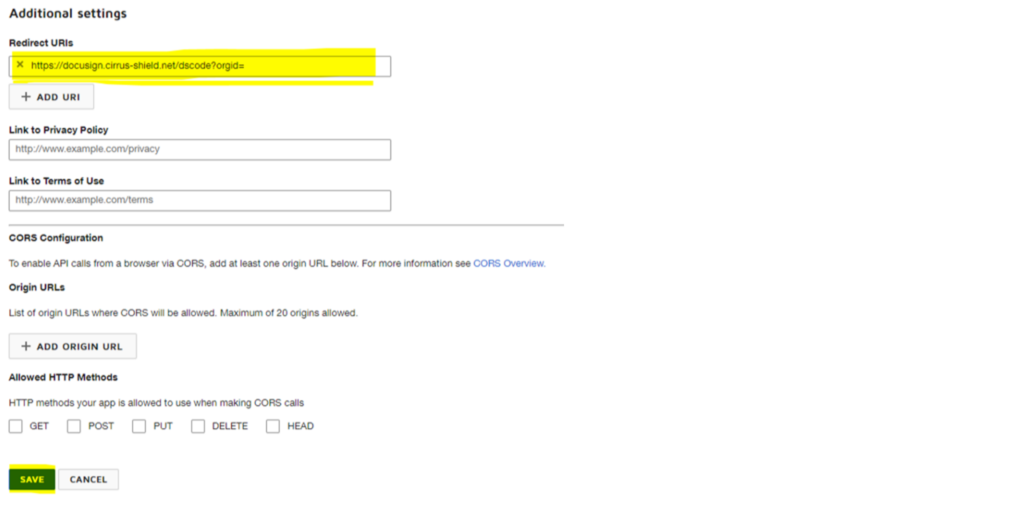
N.B: Add the following URL to be able to integrate DocuSign with Cirrus Shield, it is crucial for the success of the configuration part, here is the URL: https://docusign.cirrus-shield.net/dscode?orgid=YOUR_ORG_ID
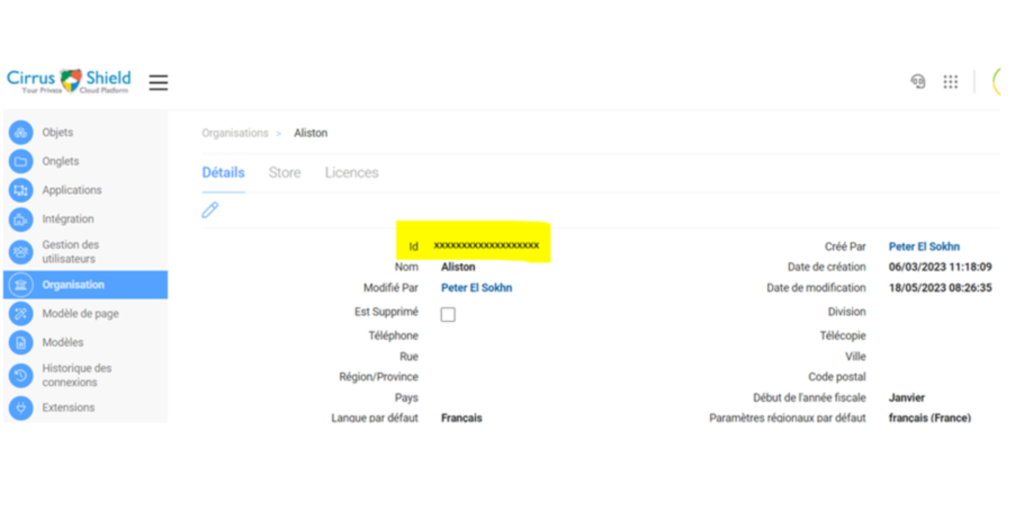
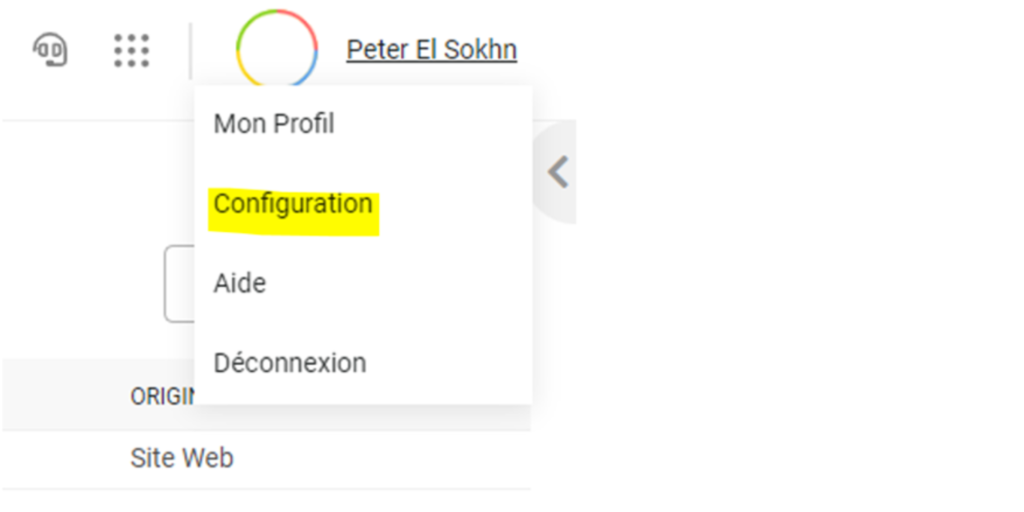
To get your organization ID, you must go to the Configuration in Cirrus Shield

Then you go to the Organization tab, and you can get your organization ID.
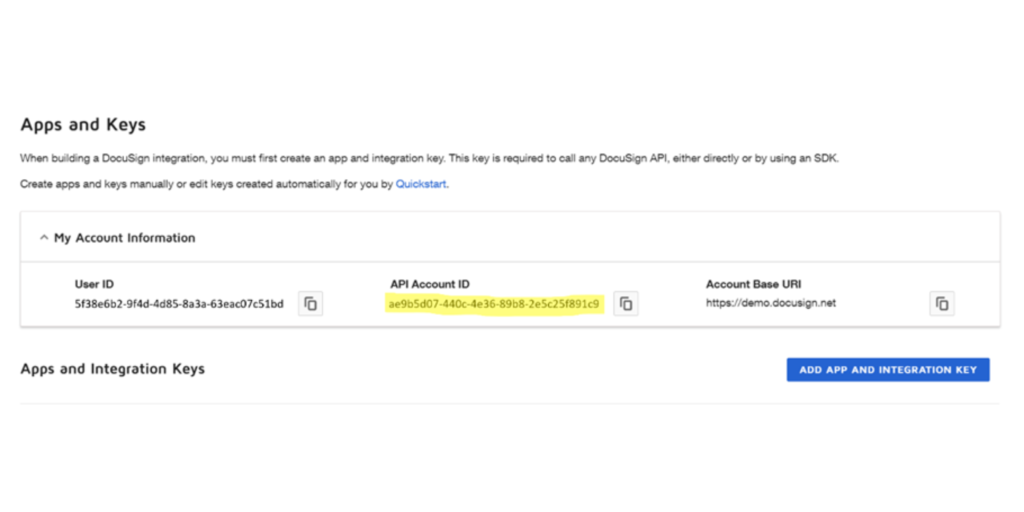
3. Retrieve Your Account’s API Identifier:
To seamlessly integrate and utilize the API, it is essential to obtain the API identifier associated with the account you intend to use for sending envelopes. To do so, you must go to the Settings tab -> Apps & Keys and there you will find the API account Id in “My Account Information” section.
IN CIRRUS SHIELD :
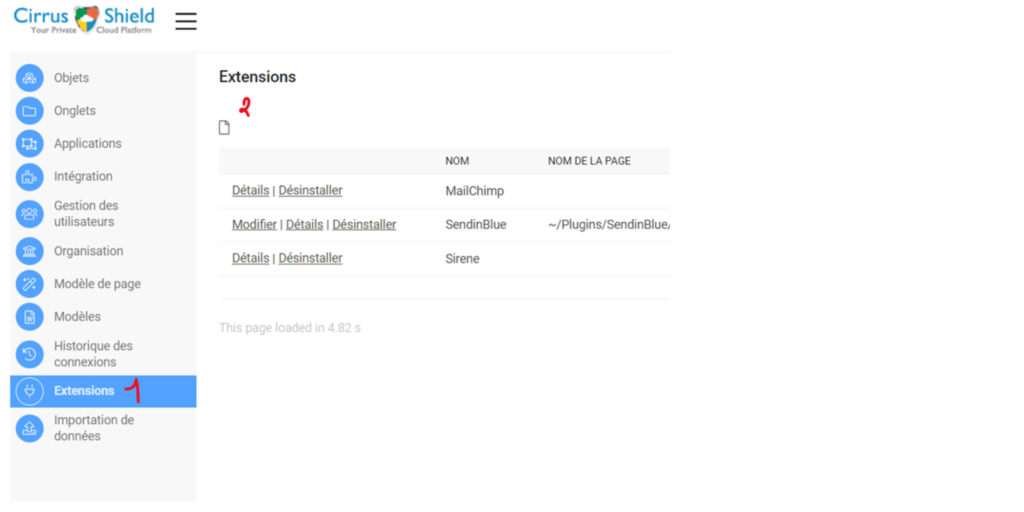
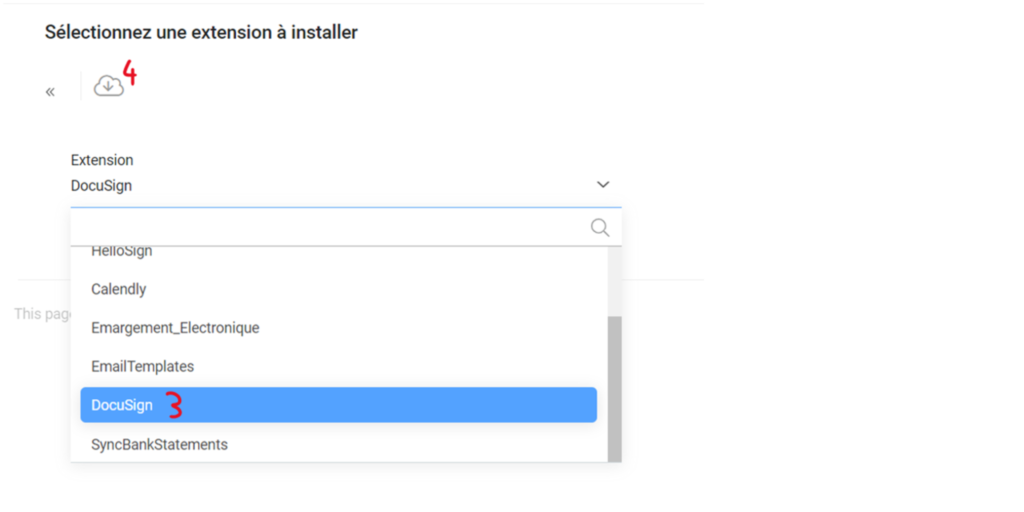
- Install the DocuSign Plugin:
Go to “Configuration” in Cirrus Shield, then select “Extensions.” Install the DocuSign plugin to enable integration.
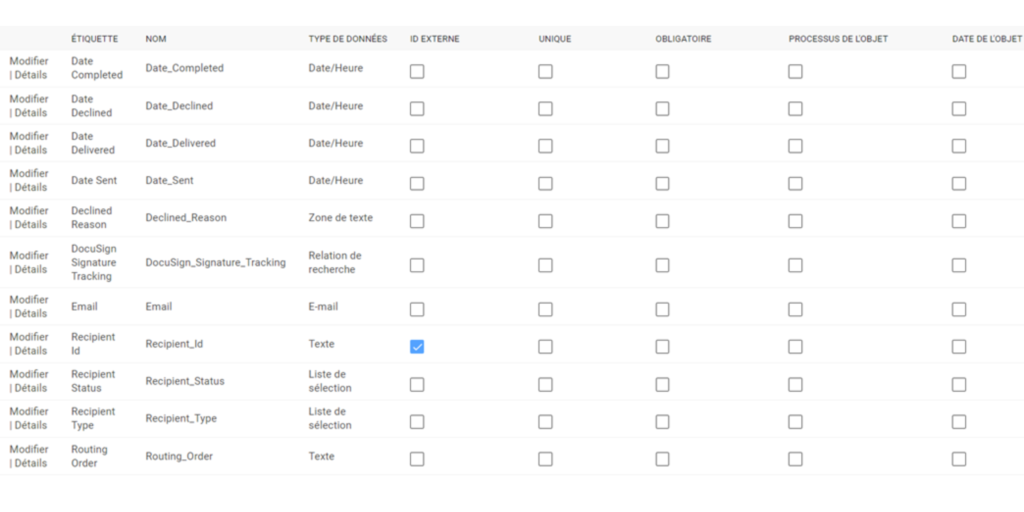
2. Creation of “DocuSign Signature Tracking” object:
To enable the DocuSign Plugin, you need to create two custom objects named “DocuSign Signature Tracking” and “DocuSign Recipient Tracking” with specific fields and field types as shown in the following images:
DocuSign Signature Tracking:

DocuSign Recipient Tracking:
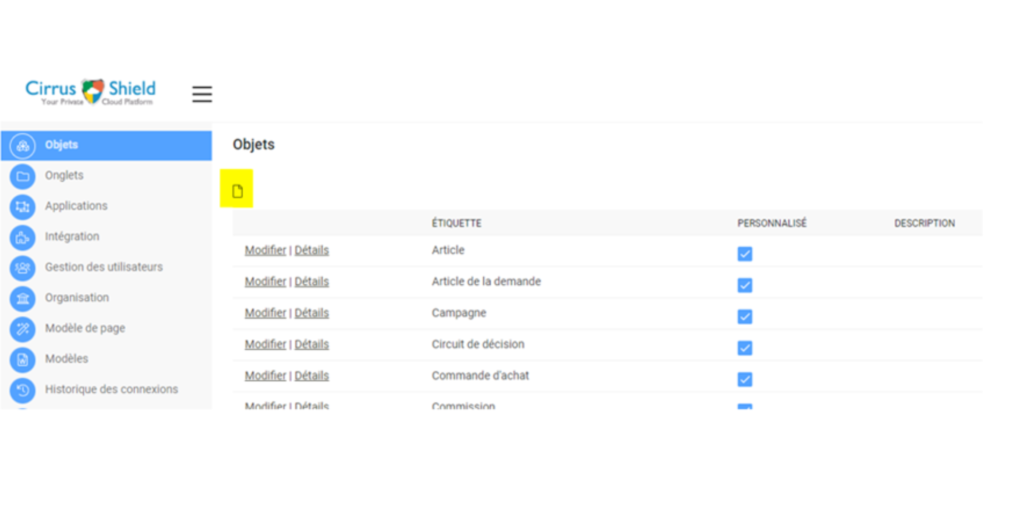
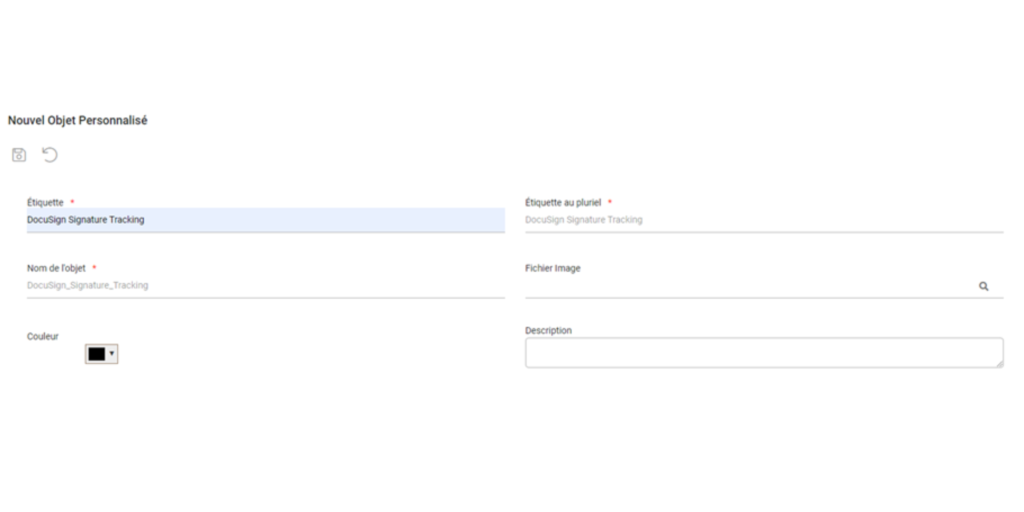
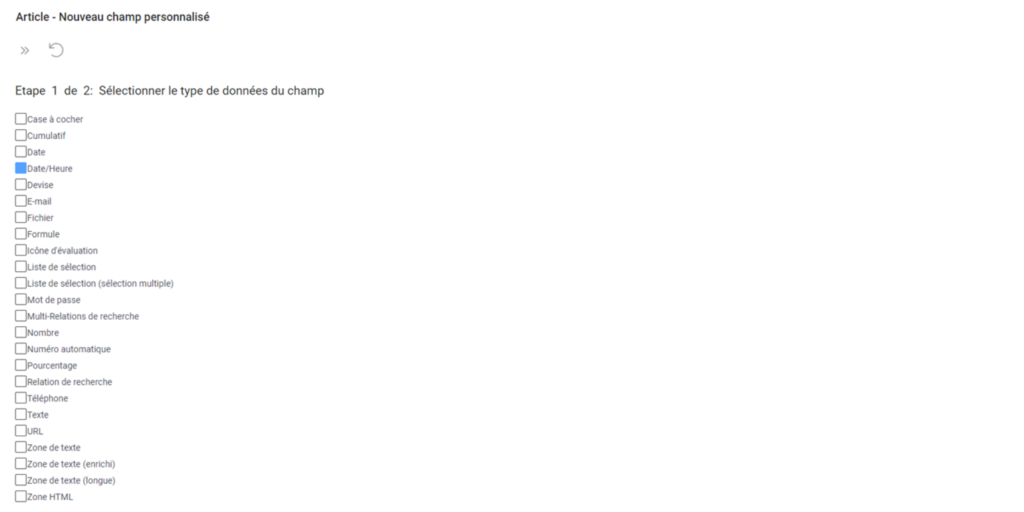
To be able to create an object you must go to Configuration -> Objects and click on the button to create an object
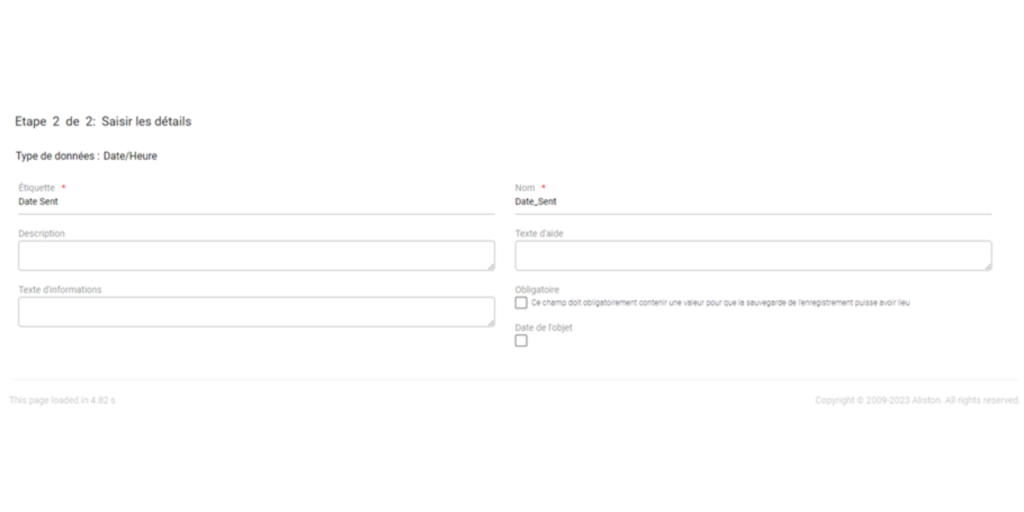
After creating the object, go to “Champs personnalisés” and create a new field, based on the fields that is shown in the images of “DocuSign Signature Tracking” & “DocuSign Recipient Tracking”
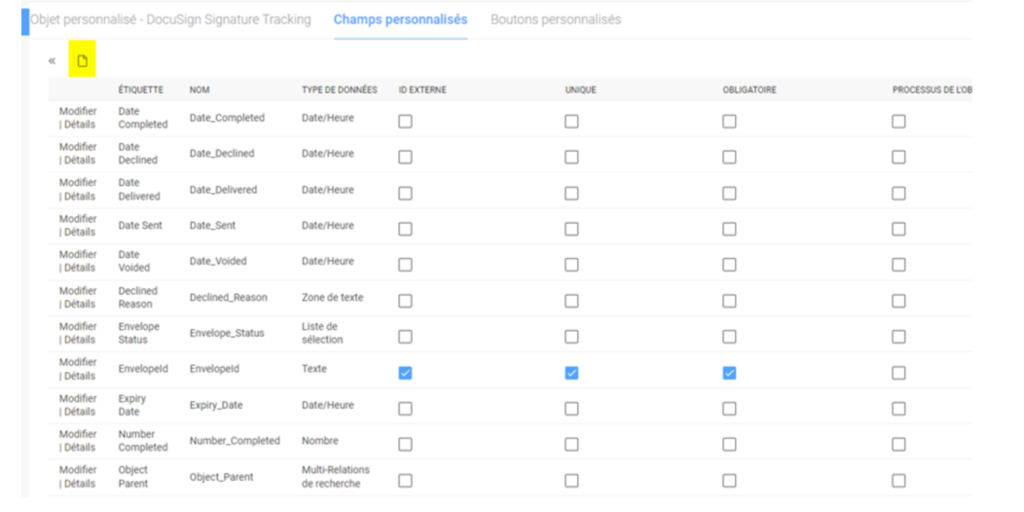
N.B : Make sure to create the fields with the same name and same type of the images regarding “DocuSign Signature Tracking,” “DocuSign Recipient Tracking” and the added fields on the “Document” object
It should be the same done for the rest of the fields based on their name and field types.
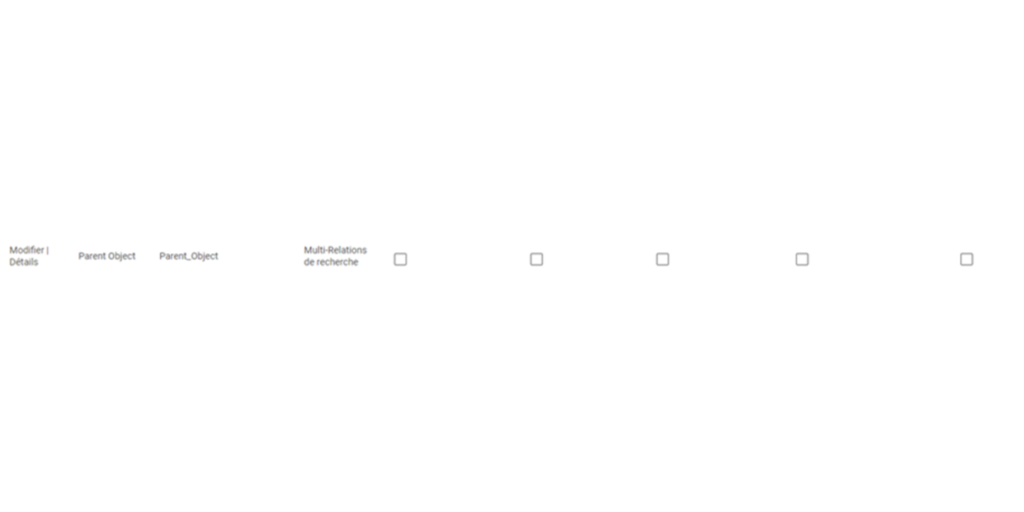
3. Adding Fields for “Document”:
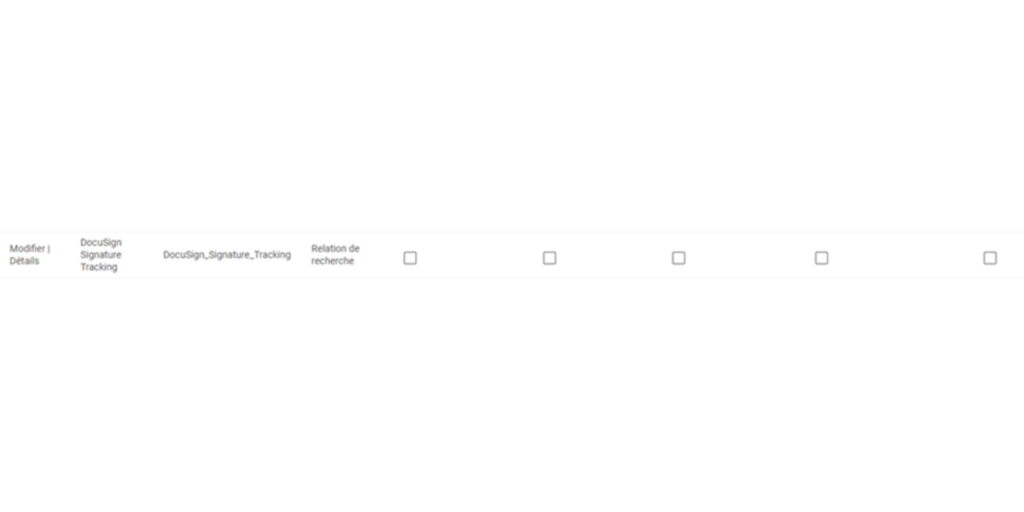
To establish a connection between the “Document” object and “DocuSign Signature Tracking,” you need to create two fields: “DocuSign_Signature_Tracking” and “Parent_Object.” These fields serve specific purposes and are detailed below:
DocuSign_Signature_Tracking Field :
Create a field named “DocuSign_Signature_Tracking” in the “Document” object. This field will serve as a link to the “DocuSign Signature Tracking” object, enabling the association between documents and signature tracking records.
Parent_Object Field :
Create a field named “Parent_Object” in the “Document” object. Set the field type to “Multi Lookup.” This field allows you to link the document with the parent object of your choice, such as “Lead,” “Contact,” “Quote,” or any other relevant object.
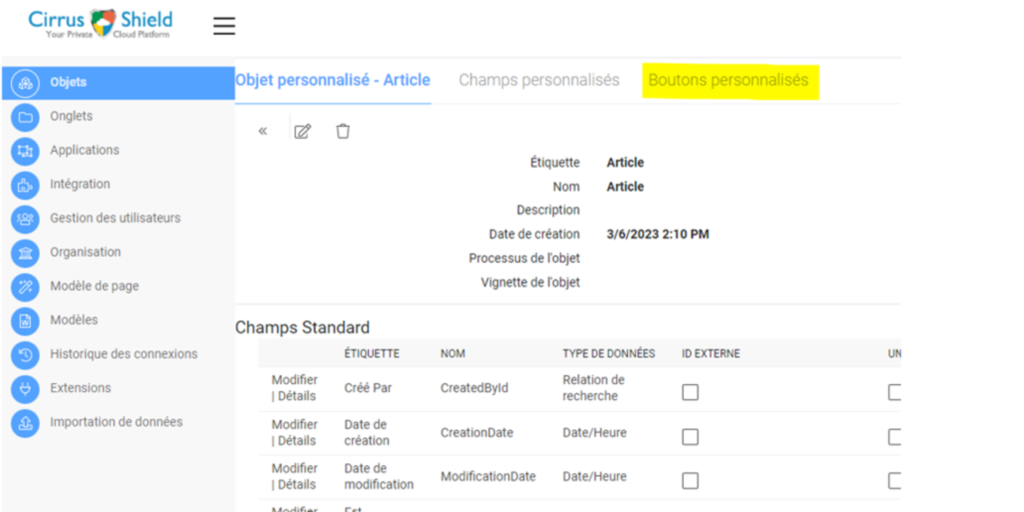
4. JavaScript Button :
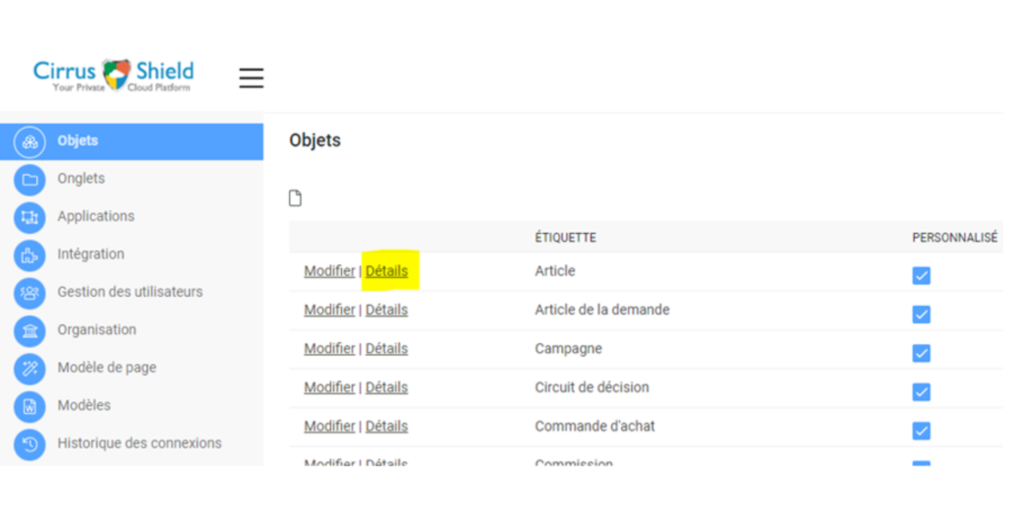
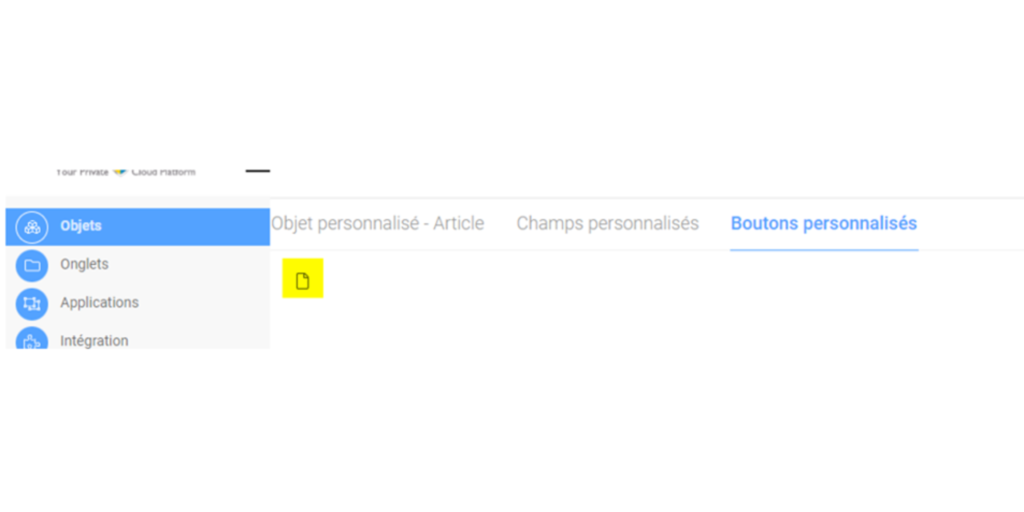
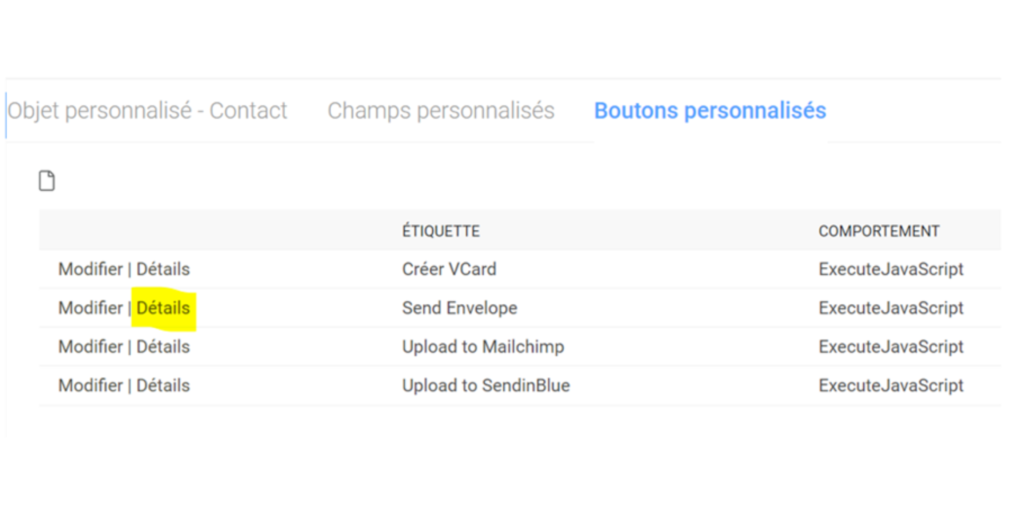
Create a button for the object that you will be using with DocuSign. To be able to create a JavaScript button, you must go to Configuration -> Object -> Details -> Bouton Personnalisés.
Then you create a button with the following information
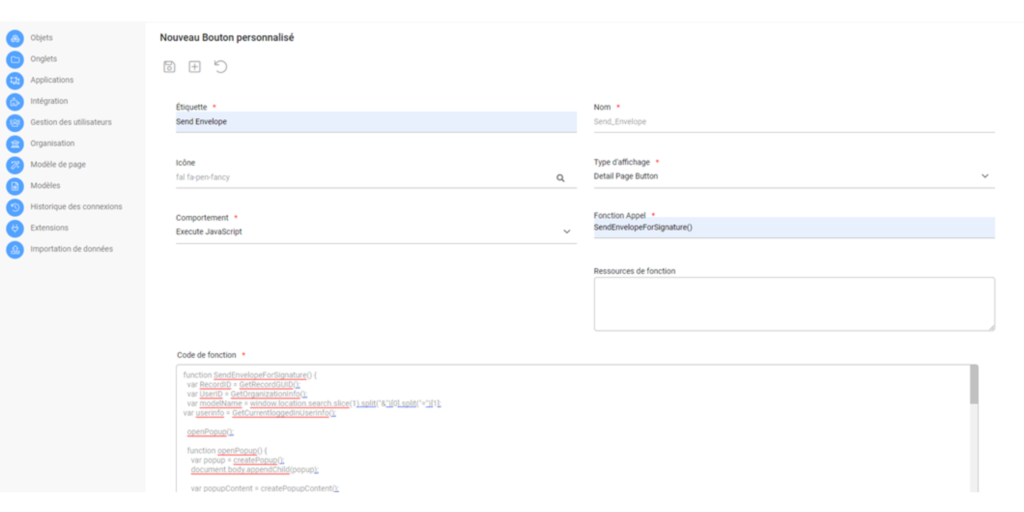
Here is the code that should be used for the button :
function SendEnvelopeForSignature() {

  var RecordID = GetRecordGUID();

  var UserID = GetOrganizationInfo();

  var modelName = window.location.search.slice(1).split("&")[0].split("=")[1];

var userinfo = GetCurrentloggedInUserInfo();


  openPopup();


  function openPopup() {

    var popup = createPopup();

    document.body.appendChild(popup);


    var popupContent = createPopupContent();

    popup.appendChild(popupContent);


    var closeBtn = createCloseButton(popup);

    popupContent.appendChild(closeBtn);


    var iframe = createIframe(RecordID, UserID, modelName, userinfo);

    popupContent.appendChild(iframe);

  }


  function createPopup() {

    var popup = document.createElement("div");

    popup.id = "myPopup";

    popup.style.cssText = "position: fixed; z-index: 9999999; left: 50%; top: 50%; transform: translate(-50%, -50%); width: 100%; height: 100%; overflow: auto; background-color: rgba(0,0,0,0); display: flex; justify-content: center; align-items: center;";

    return popup;

  }


  function createPopupContent() {

    var popupContent = document.createElement("div");

    popupContent.style.cssText = "background-color: white; padding: 20px; border: 1px solid #888; width: 80%; height: 80%; position: relative;";

    return popupContent;

  }


  function createCloseButton(popup) {

    var closeBtn = document.createElement("span");

    closeBtn.innerHTML = "×";

    closeBtn.style.cssText = "position: absolute; top: 0; left: 98%; font-size: 28px; font-weight: bold; cursor: pointer;";

    closeBtn.onclick = function () {

      popup.style.display = "none";

    };

    return closeBtn;

  }


  function createIframe(RecordID, UserID, modelName, userinfo) {

    var iframe = document.createElement("iframe");

    iframe.src = `https://docusign.cirrus-shield.net/${userinfo["Language"]}/SendTemplate?orgid=${UserID["Id"]}&objectName=${modelName}&RecordGuid=${RecordID}`;

console.log(userinfo);

    iframe.style.cssText = "width: 100%; height: 100%; border: none;";

    return iframe;

  }

}
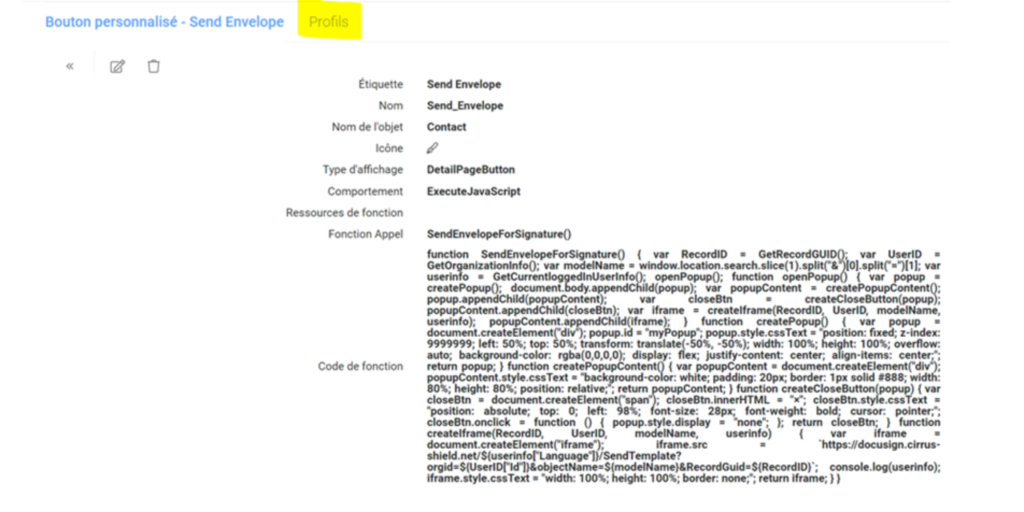
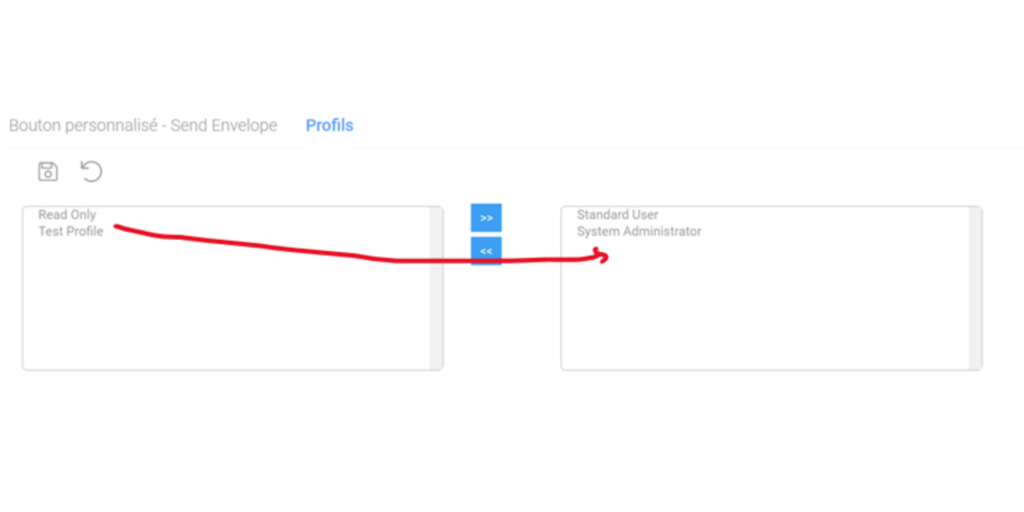
Make sure to change the visibility of the button based on the users that will be using it, you can do this by going to the object where you created the button -> button details -> Profils
And finally, you will be able to see the button in the details page of the record of the specific chosen object
Configuration
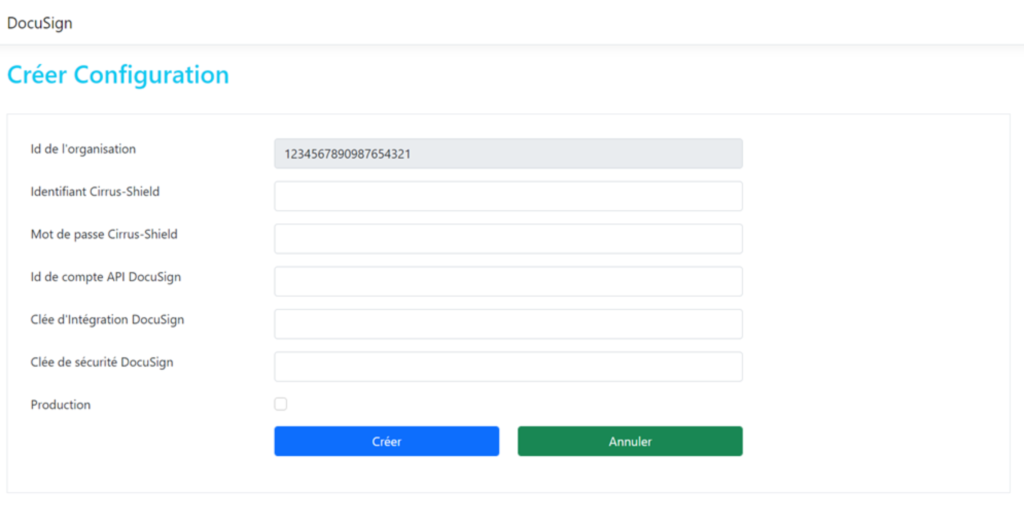
To configure the plugin that you installed, you will have to go to the details of the DocuSign installed plugin first, then go to the configuration page by clicking on the button “Configuration.”

You will be navigated to the configuration page. Begin by entering your Cirrus-Shield credentials (Username & Password) and your DocuSign credentials (API Account Id, Integration Key & Secret Key). Additionally, you will find a checkbox that indicates whether your application is in a developer or production state; it should be selected based on the state of the application. Finally, click “Create” to save your configuration to Cirrus-Shield.
N.B : Before the creation/update of your configuration, make sure to be logged in to your DocuSign Account first with the user that will be used to send envelopes.
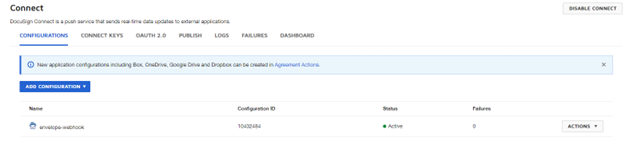
After the configuration is saved successfully, you should be able to see the created webhook in DocuSign by going to the settings -> Connect page. This webhook is crucial to track each envelope that will be sent for signature in Cirrus Shield
DocuSign Anchor Tabs
Before choosing the documents that should be signed, you can modify them by adding anchor tabs which will represent information that should be filled from the receiver or information about the envelope itself, here are the available anchor tabs that you can use:
| Types of anchors | Anchor Strings |
| Signature | \s1\, \s2\, \s3\ |
| Company | \c1\, \c2\, \c3\ |
| Title | \t1\, \t2\, \t3\ |
| First Name | \fn1\, \fn2\, \fn3\ |
| Last Name | \ln1\, \ln2\, \ln3\ |
| Full Name | \fun1\, \fun2\, \fun3\ |
| Decline | \decline\ |
| Date Signed | \ds1\ |
| Radio Button (S1, S2, S3 representing the recipients) | \S1radioYes\, \S1radioNo\, \S2radioYes\, \S2radioNo\, \S3radioYes\, \S3radioNo\ |
| Check Box (S1, S2, S3 representing the recipients) | \S1chbx1\, \S1chbx2\, \S1chbx3\, \S2chbx1\, \S2chbx2\, \S2chbx3\, \S3chbx1\, \S3chbx2\, \S3chbx3\, |
To use specific documents for DocuSign, you must add them to Cirrus Shield first. So, you must go to Configuration -> Modèle and you create a template

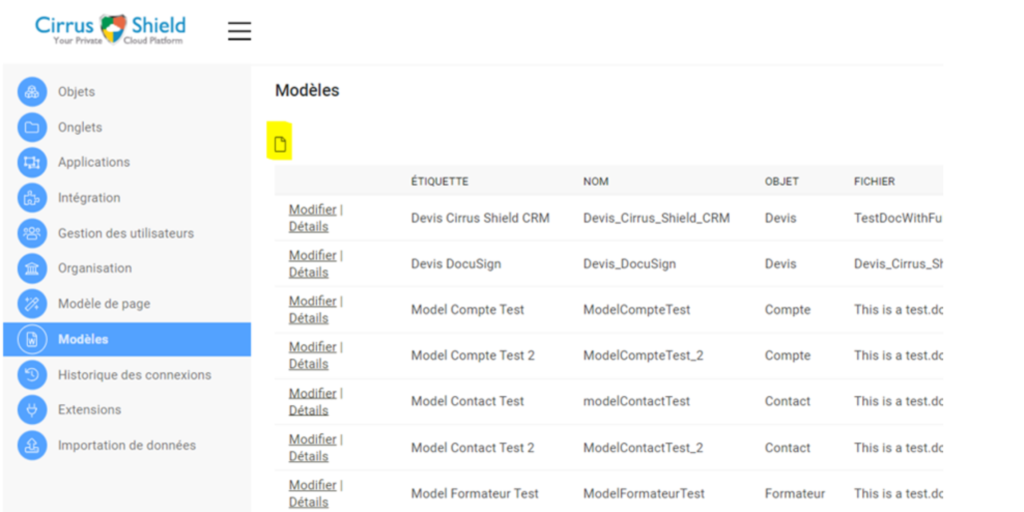
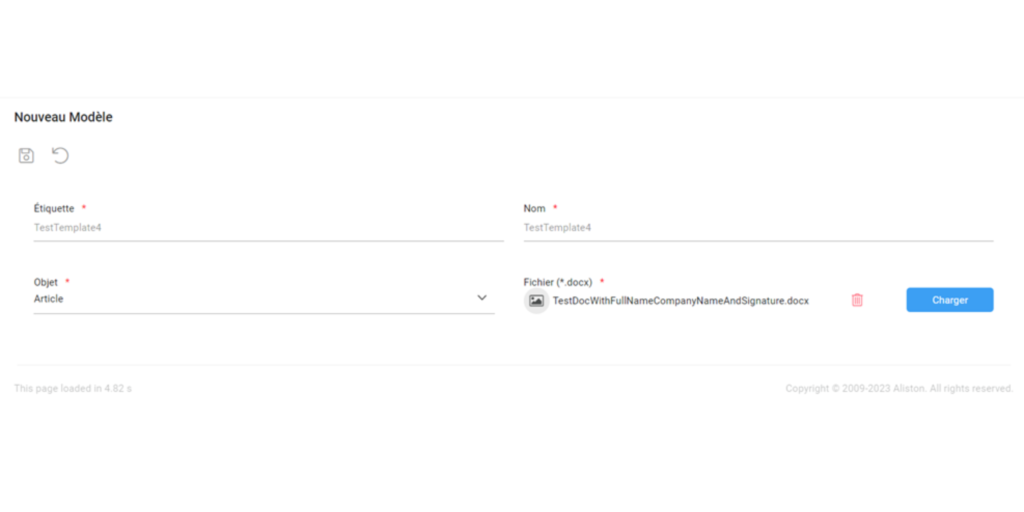
Here you can fill information about the template, and you can add the document with the added anchor tab to be used with the DocuSign plugin. Make sure to choose the object that you will be linking the envelope to it, whether it is a “Lead,” “Contact,” “Quote,” or any other object of your preference.
DocuSign Template Manipulation
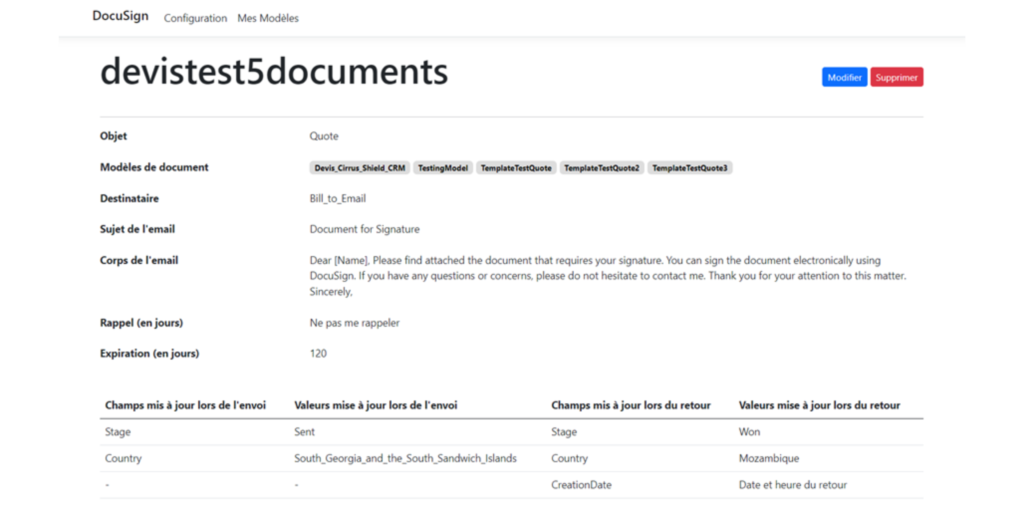
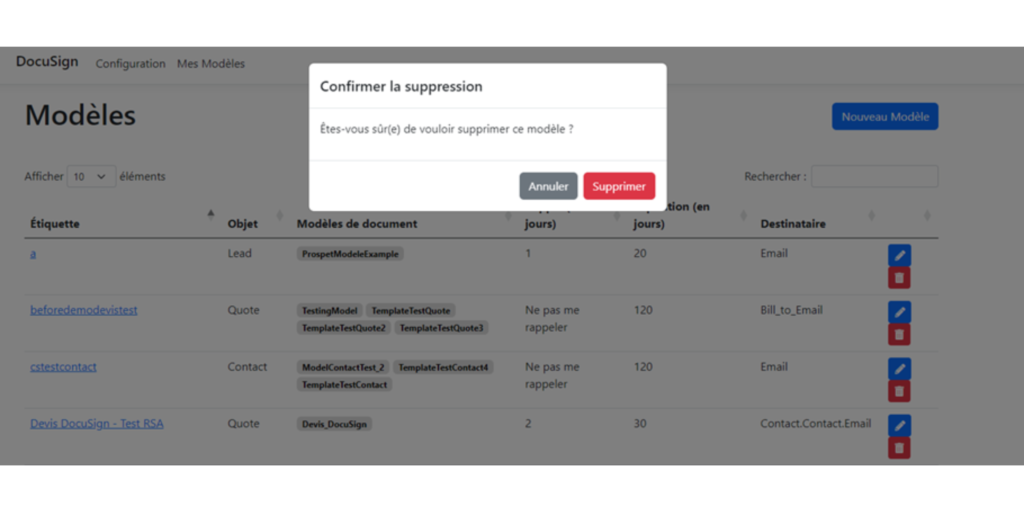
After the configuration part is successfully done, you can go to “Mes Modèles” tab, and you will be able to see a table with the available templates for your account.

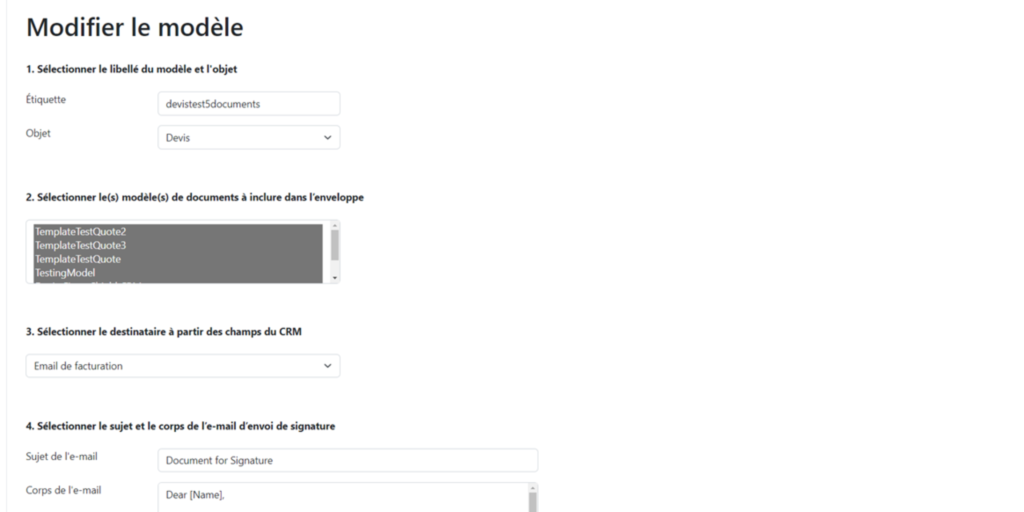
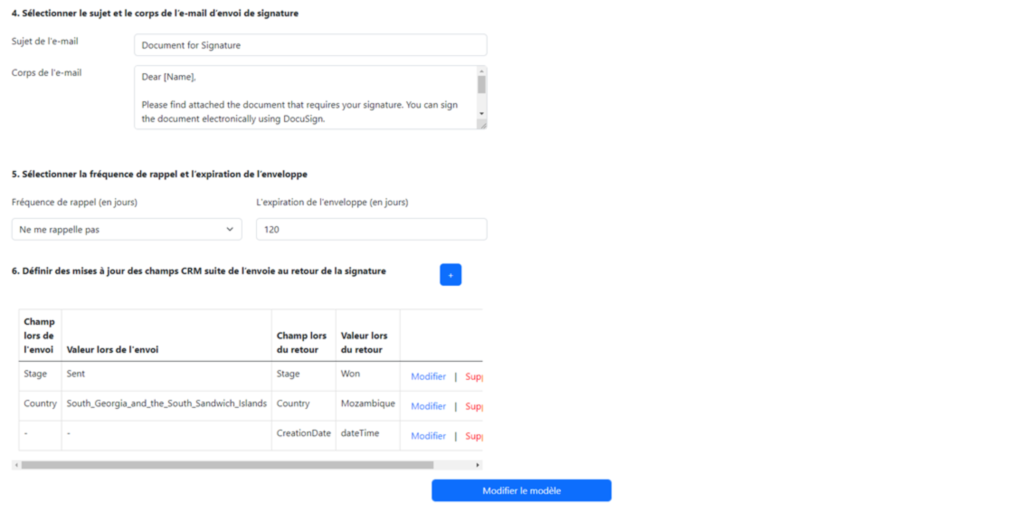
Click on the button “Nouveau Modèle” to create a new template, a new form will open, fill it with the necessary information and upon clicking on the create button, your template will be created. Here is an example:
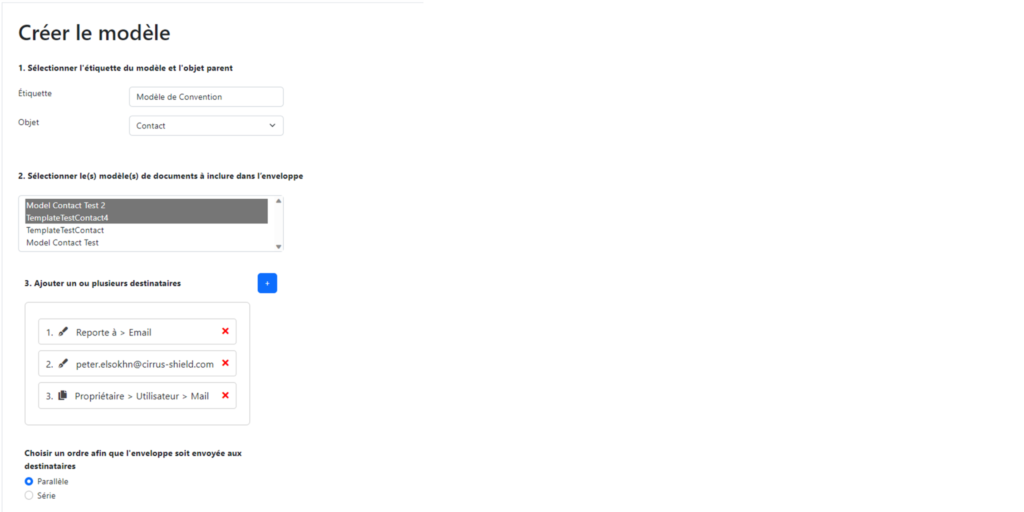
In Part 3 of the process, you have the flexibility to designate recipients for the envelope. You can manually input the recipient details or conveniently choose recipients from fields within Cirrus Shield.
Each recipient can be assigned a specific type, such as “Signer” or “Carbon Copy,” defining their role in the signing process. You have the freedom to arrange the recipient order according to your preferences, whether it is based on the sequence in which they will receive the envelope or any other custom order you select, such as “Series.” This step allows you to fine-tune recipient settings for efficient envelope distribution.
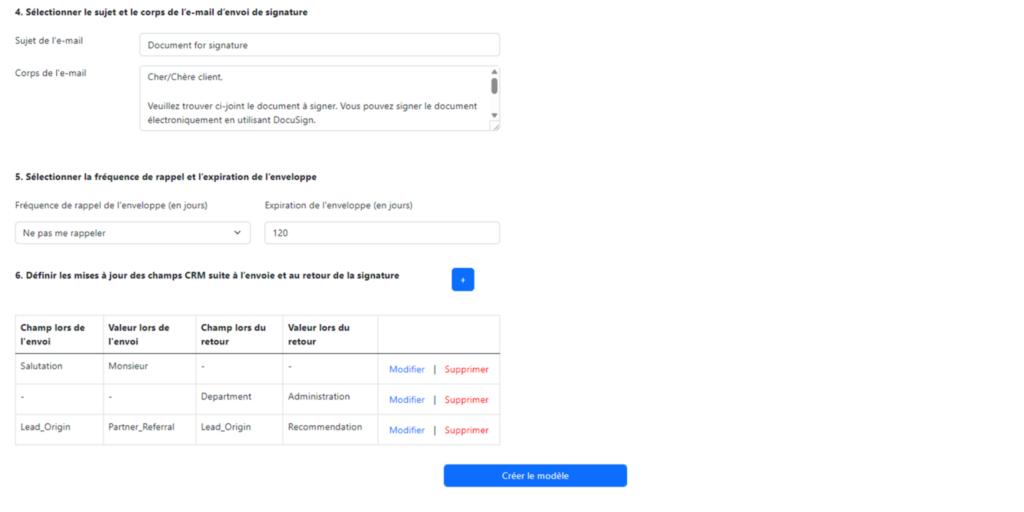
In part 6, you will be able to choose the fields that will be modified upon sending and signing the envelope. Those fields will be based on the object that was chosen in part 1 of the form. You are also able to manipulate the available templates by checking the details regarding a template, modifying a template, or deleting it.