Objective:
The objectives of this guide are as follows:
- Prepare the implementation of the portal (data model)
- Activate the portal
- Activate users for the portal
- Prepare data for portal usage
1 – Preparing the Portal Implementation:
First, ensure that all required fields for the teacher portal exist in the environment. To do this, review the Excel file below and verify that all fields exist and are correctly configured in the environment: Placeholder for Excel file
2-Activating the Portal
First, visit the portal configuration link:
https://teacher.cirrus-shield.net/Configuration?orgid={Environment ID}
Exemple : https://teacher.cirrus-shield.net/Configuration?orgid=3398168867118598228
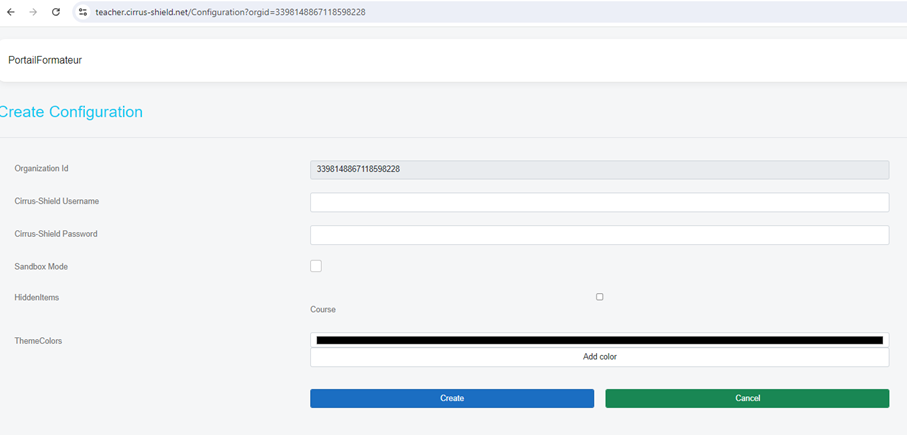
On this page, fill in the username and password fields with the environment credentials.
If the environment is a Beta environment, check the “Sandbox Mode” box.
If the environment does not use the concept of “Courses” (multiple different courses taught during a single training), check the “Course” box. This will hide elements related to this concept. Finally, click on “Create” to activate the teacher portal in this environment.
3- Activating Users for the Portal:
First, ensure that the environment has enough “Teacher” licenses to activate new users.
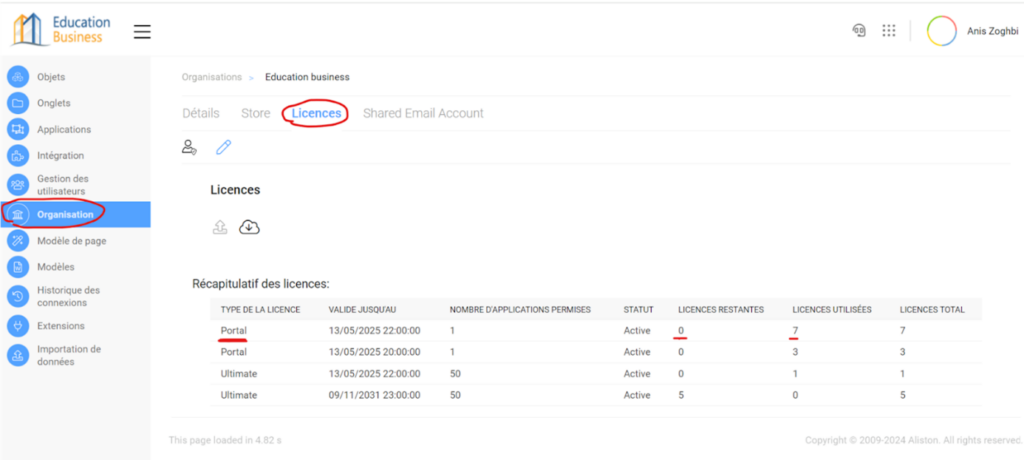
To do this, go to the configuration page (only the environment administrator can access it).
Then, click on the “Organization” tab and, on the organization page, click on “Licenses.”
On this page, review the “Portal” type licenses. The remaining licenses column will allow you to see if the environment has enough licenses for new portal users.
Once this is done, go to the teacher for whom you want to activate the portal user and click the “Activate Teacher Portal” button outlined in red in the image below.
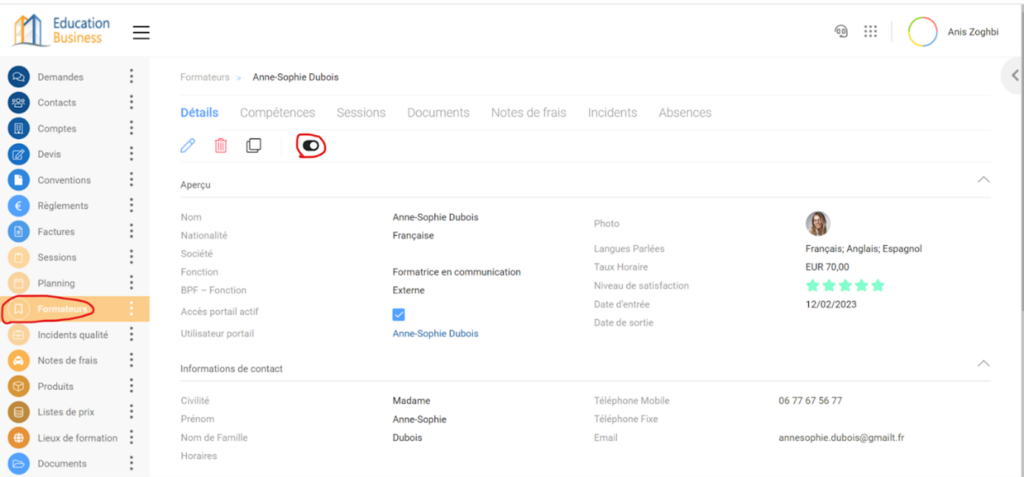
This button will create a user for the designated teacher and send them an email with the portal link as well as their username and password.
To configure the email sent to the teacher, go to the email templates and modify (or create if it does not exist) the “Teacher Portal Activation” template.
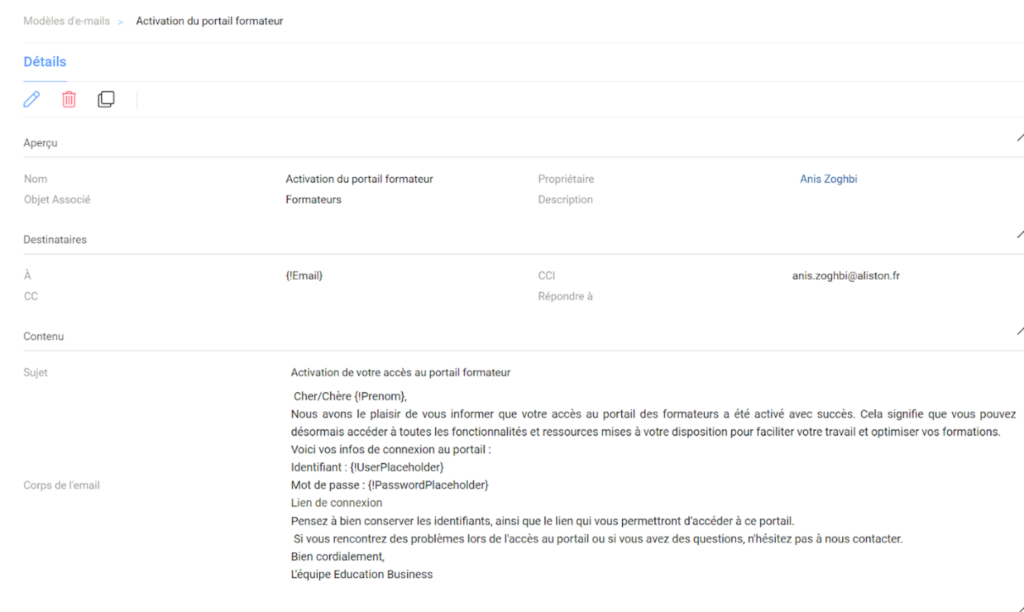
Be careful not to modify the “UserPlaceholder” and “PasswordPlaceholder” fields, as this is where the generated username and password will be indicated.
4-Preparing Data for Portal Use :
At this stage, the portal and users have been activated. It is now time to prepare the data that teachers will see on their portal.
Note: These steps outline how to proceed with new data, but all pre-existing data will already be visible to a teacher if their user has been activated.
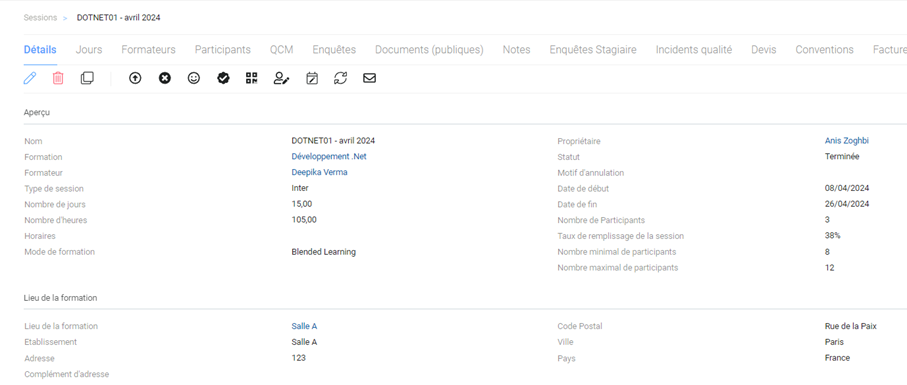
– Click on the “Sessions” tab and create a new session.
– Ensure to fill in the “Overview” and “Location” sections, as most of this information will be visible on the portal.
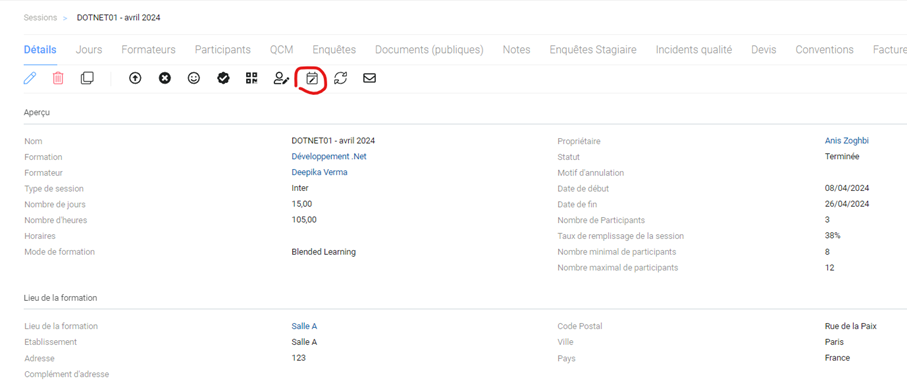
Once the session is created, click on the “Complete Session Information” button, which is highlighted in red
This button will retrieve product information such as the minimum/maximum number of participants, number of hours and days, and other details (depending on the information present on the product).
Additionally, it will create the teacher in the “Teachers” tab displayed in the screenshot above.
This is necessary to ensure the session’s visibility to the teacher.
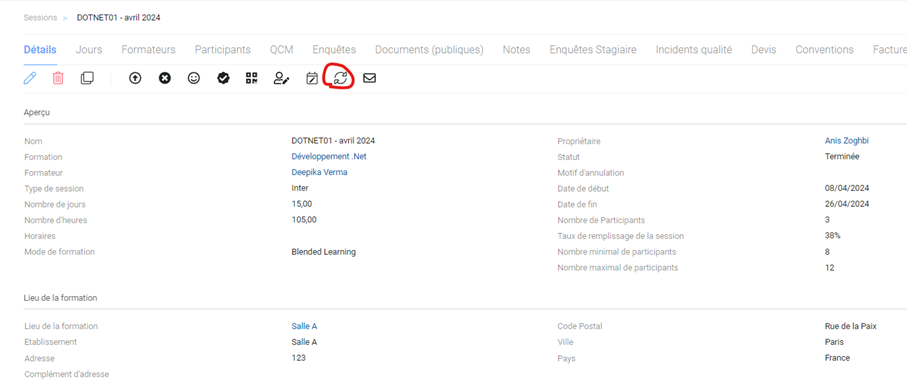
Next, you need to create various lectures for the session. To do this, click on the “Manage Schedule” button, highlighted in red in the screenshot below:
This button allows you to quickly create lectures as well as the corresponding attendance records for participants.
Finally, if you need to display specific documents for this session to the teachers who are teaching it, you can create them in the “Public Documents” tab.
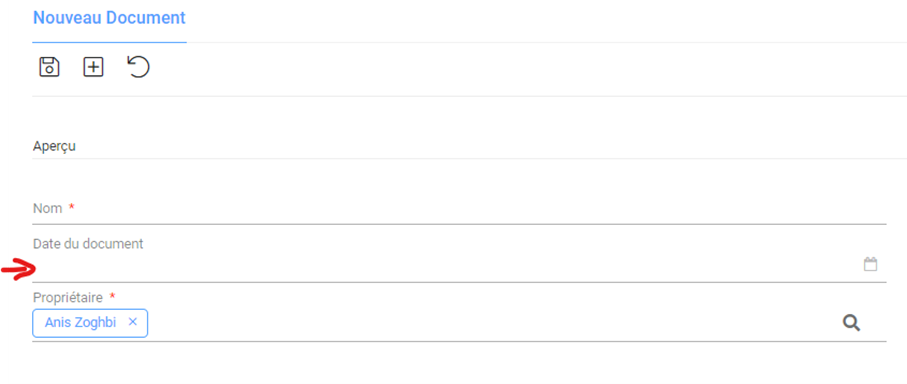
Attention: These documents will also be visible to the participants of this session. If the document should only be visible to participants from a certain date, enter a corresponding date in the “Document Date” field
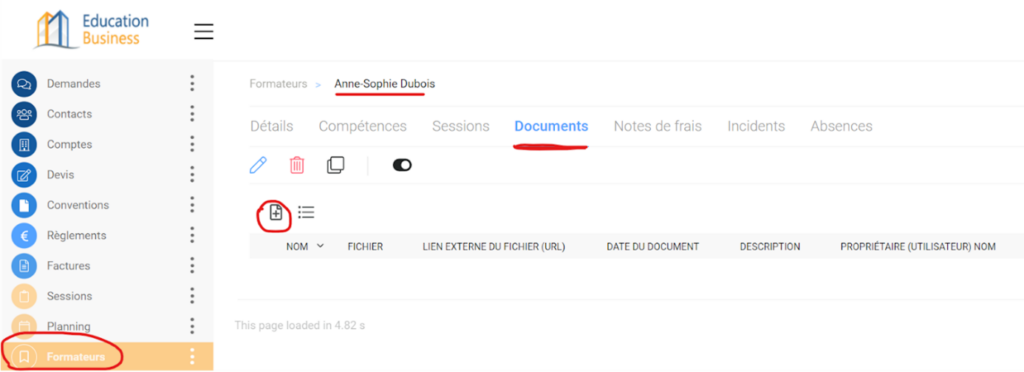
If you want to share documents with a specific teacher, you need to create the document from the teacher’s profile
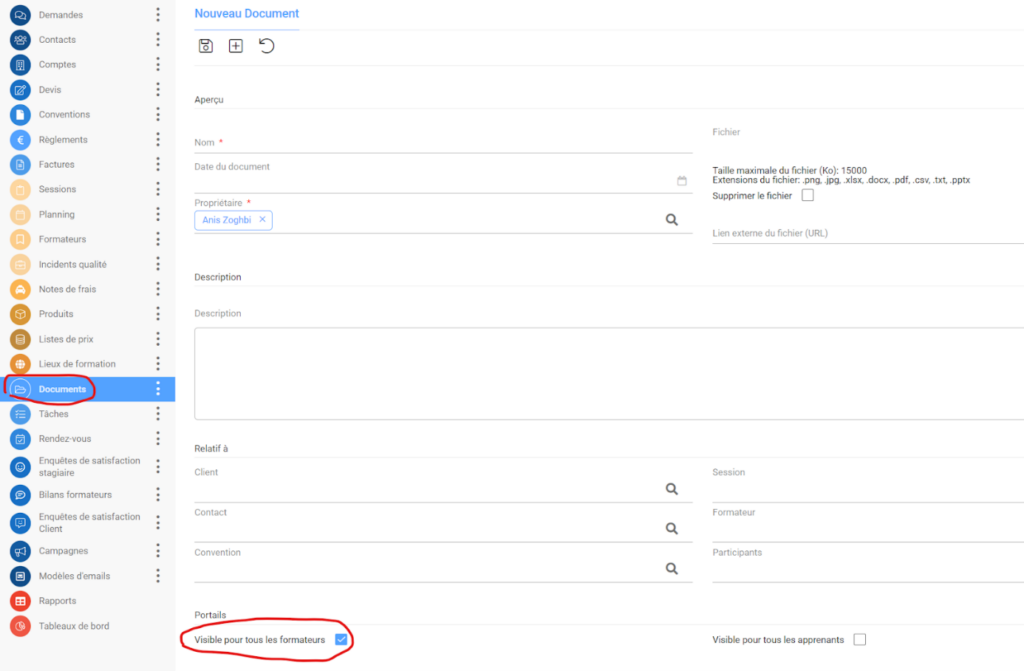
Lastly, if a document needs to be visible to all teachers (e.g., an expense report matrix), it must be created from the “Documents” tab, and the “Visible to All Teachers” box should be checked